Configuring AI Assistants
AI Assistants are AI-powered agents that investigate issues, run tasks, and recommend actions within your workspace. Each assistant has a configurable persona, permission level, and confidence thresholds that control its behavior.
For the conceptual model — how an assistant reasons, what confidence thresholds mean, and how RBAC intersects with assistant permissions — see Learn → AI Assistants. This page covers the in-product UI: where the form lives, what each field does, and how to commit changes.
Accessing Assistants
Assistants can be managed from two places:
- Workspace Studio > Assistants tab
- The dedicated Assistants page (accessible from the sidebar)
Assistant List
The Assistants page shows all configured assistants in a list with:
| Column | Description |
|---|---|
| Avatar + Name | The assistant’s profile image and display name |
| Description | What the assistant is designed for |
| Access | Who can use this assistant (Everyone, or specific users) |
| Permissions | Read Only or Read and Write |
| Filter Confidence | Threshold for suggesting tasks (e.g., 70%) |
| Run Confidence | Threshold for executing tasks (e.g., 80%) |
Action buttons: Add Assistant (top right), Delete (trash icon per assistant).

Available Assistants
The Sandbox workspace includes four pre-configured assistants:
Admin Abby
- Profile: Strict — Read and Write
- Access: Restricted (specific users only)
- Filter Confidence: 80% | Run Confidence: 87%
- Best for: Sensitive resources and remediation tasks
- Behavior: Has write access, meaning it can suggest and execute remediation actions — not just diagnostics. Restricted to authorized users for security.
Eager Edgar
- Profile: Standard — Read Only
- Access: Everyone
- Filter Confidence: 70% | Run Confidence: 80%
- Best for: Interactive triage and root cause analysis
- Behavior: Proactive, runs tasks readily, explores broadly. Good choice when you’re actively investigating and want the assistant to be thorough.
Cautious Cathy
- Profile: Conservative — Read Only
- Access: Everyone
- Filter Confidence: 80% | Run Confidence: 90%
- Best for: Autonomous response to alerts, tickets, and webhooks
- Behavior: Higher confidence thresholds mean fewer false positives. Better for automated pipelines where you want more certainty before acting.
Dev Danica
- Profile: Standard — Read Only (Custom)
- Access: Everyone
- Filter Confidence: 70% | Run Confidence: 80%
- Best for: Developer-focused troubleshooting
- Behavior: Similar settings to Eager Edgar, tailored for development environments. Good default choice for developers doing self-service investigation.
Configuring an Assistant
Click an assistant’s name to open its configuration page. You can switch between Form and YAML views using the toggle in the upper right.
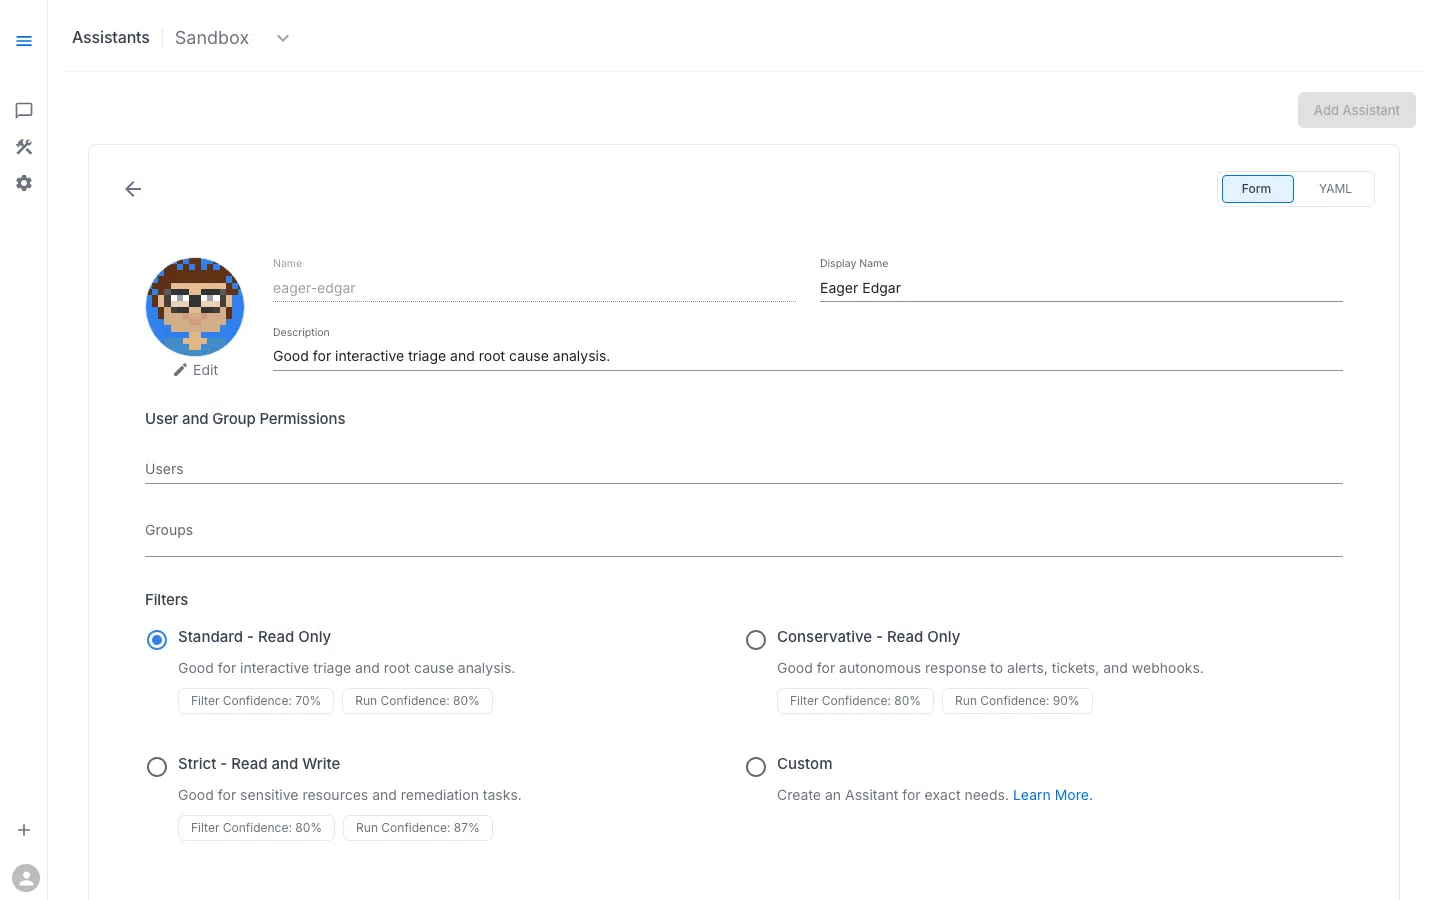
Form View
The form provides structured fields:
Identity:
- Name — internal identifier (e.g.,
eager-edgar) - Display Name — shown in the UI (e.g., “Eager Edgar”)
- Description — explains the assistant’s purpose
- Avatar — click “Edit” to change the profile image
User and Group Permissions:
- Users — assign specific user access
- Groups — assign group-based access
Filters (Preset Profiles):
| Profile | Access | Filter | Run | Description |
|---|---|---|---|---|
| Standard — Read Only | Read Only | 70% | 80% | Good for interactive triage and root cause analysis |
| Conservative — Read Only | Read Only | 80% | 90% | Good for autonomous response to alerts, tickets, and webhooks |
| Strict — Read and Write | Read and Write | 80% | 87% | Good for sensitive resources and remediation tasks |
| Custom | Configurable | Configurable | Configurable | Create an assistant for exact needs |
YAML View
Switch to the YAML tab for full configuration control. The YAML representation includes all settings and is suitable for version control and bulk configuration.
Saving Changes
Assistant changes follow a Git-based workflow:
- Select a Branch (defaults to main)
- Make your changes
- Click Commit to save
This ensures all configuration changes are versioned and auditable.
Creating a New Assistant
- Click Add Assistant in the upper right
- Choose a preset profile or select Custom
- Fill in name, display name, and description
- Configure user and group permissions
- Set confidence thresholds (or use the preset values)
- Click Commit to save
Picking a profile
Use this table when you are creating a new assistant and choosing a preset:
| Scenario | Preset | Threshold pair |
|---|---|---|
| Interactive troubleshooting (a human is at the screen) | Standard — Read Only | 70 / 80 |
| Automated alert response (results fan out to a channel/ticket) | Conservative — Read Only | 80 / 90 |
| Remediation with write access | Strict — Read and Write | 80 / 87 |
| Anything outside these patterns | Custom | tune both manually |
The conceptual reasoning behind why these pairs match these scenarios — what filter confidence and run confidence each do — lives in Learn → AI Assistants → Confidence thresholds.
Permissions reminder
When you assign users or groups to an assistant, the platform always applies the intersection of the assistant’s permissions and the user’s workspace permissions — the lower-privileged side wins. A read-write assistant assigned to a read-only user cannot perform writes; a read-only assistant cannot be coerced into writes by an admin user. See Learn → AI Assistants → RBAC, in concept for the full model.
Practical consequence: restrict write-capable assistants (like Admin Abby) to authorized users explicitly — do not rely on the user side of the intersection alone.