
Installing RunWhen Local (Private Runner)
This page describes the installation process for the Hybrid Mode deployment, with self-hosted runners that execute tasks within your own environment.
By default, RunWhen Local automatically attempts to discover Kubernetes resources within its own cluster. Additional Cloud Discovery Configuration will enable discovery of additional Kubernetes/AWS/Azure/GCP resources.
https://www.youtube.com/watch?v=QxnNXMutN_wCreate a Kubernetes Namespace
The first step to installing the self-hosted runner (which connects to the RunWhen Saas), is to create a dedicated Kubernetes namespace:
namespace=<namespace/project name>
kubectl create namespace $namespace

## Optional - Create a namespace resource quota (limits will vary with each environment)
cat <<EOF | kubectl apply -f -
apiVersion: v1
kind: ResourceQuota
metadata:
  name: compute-quota
  namespace: $namespace
spec:
  hard:
    requests.cpu: "8"
    requests.memory: "8Gi"
    limits.cpu: "16"
    limits.memory: "16Gi"
EOF
Create the RunWhen Secrets
There are two useful secrets that can be created before deploying the Helm chart:
Runner Registration Secret
This secret is used by the runner operator to connect and authenticate to the RunWhen SaaS service. It then remains connected and manages all automation tasks.
From the workspace creation wizard, select Register a Runner (alternatively, if the wizard is gone, this can be performed from Configuration -> Workspace -> Admin Tools)
Select a helpful and unique name for your the self-hosted runner (often referred to as a location)
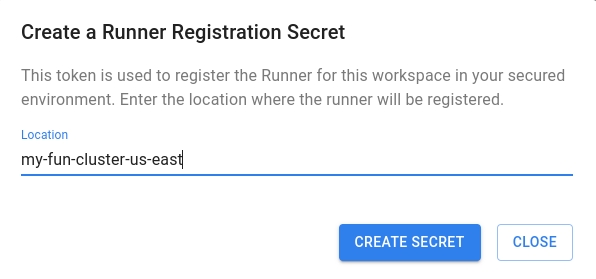
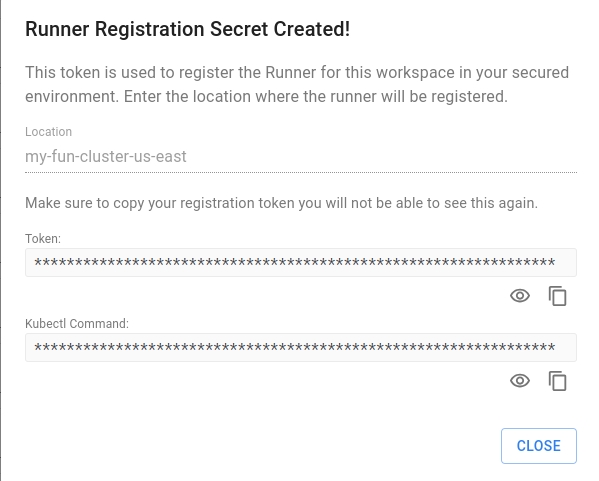
Apply the secret into the namespace and the
runnerpod will pick it up and begin the registration process
kubectl create secret generic runner-registration-token --from-literal=token="[TOKEN]" -n $namespaceWorkspace Upload Secret
This secret is used by runwhen-local to perform a scheduled discovery and configuration upload of your cloud resources. By default this process runs every 4 hours, which can be overridden in the helm chart.
You can perform the process without this secret if you wish to review the configuration before the upload.
From the workspace creation wizard, select Generate Upload Configuration (alternatively, if the wizard is gone, this can be performed from Configuration -> Workspace -> Admin Tools)
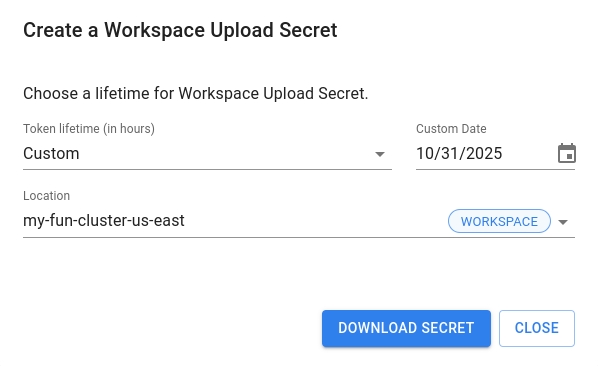
Apply the secret into the namespace and the
runwhen-localpod will use it to automatically upload your Workspace configuration
kubectl create secret generic uploadinfo --from-file=uploadInfo.yaml=[local-upload-path]/uploadInfo.yaml -n $namespaceHelm Chart Installation
Using a Helm manager of choice, deploy an instance of RunWhen Local with the Runner enabled:
Helm InstallationHelm Installation with ProxiesHelm Installation in OpenShift
namespace=<namespace/project name>
workspace=<my-runwhen-workspace>

helm repo add runwhen-contrib https://runwhen-contrib.github.io/helm-charts
helm repo update
helm install runwhen-local runwhen-contrib/runwhen-local  \
	--set runwhenLocal.autoRun.uploadEnabled=true \
	--set runwhenLocal.uploadInfo.secretProvided.enabled=true \
	--set runwhenLocal.uploadInfo.secretProvided.secretName=uploadinfo \
	--set runwhenLocal.uploadInfo.secretProvided.secretKey=uploadInfo.yaml \
	--set runwhenLocal.uploadInfo.secretProvided.secretPath=uploadInfo.yaml \
	--set workspaceName=$workspace \
	--set runner.enabled=true \
	-n $namespace
With the helm deployment settings above. the kubeconfig created to discover and interact with your cluster resources is stored on your cluster locally. It is never sent to the RunWhen Platform. By default, the service account is given cluster view permissions, but can easily be substituted with a custom kubeconfig. See Generating Service Accounts and Kubeconfigs for more details.
Please see this link for the runner specific helm chart values.
The Runner installation consists of 3 or more pods:
runner (the main control point for communicating with the RunWhen Platform)
metrics pods (used for sending SLI and Task metric data to the RunWhen Platform)
otel-collector
pushgateway
Additional pods (with a UUID naming convention) that are created and removed as needed. These pods execute the SLI and Taslk CodeBundles as instructed from the RunWhen platform.
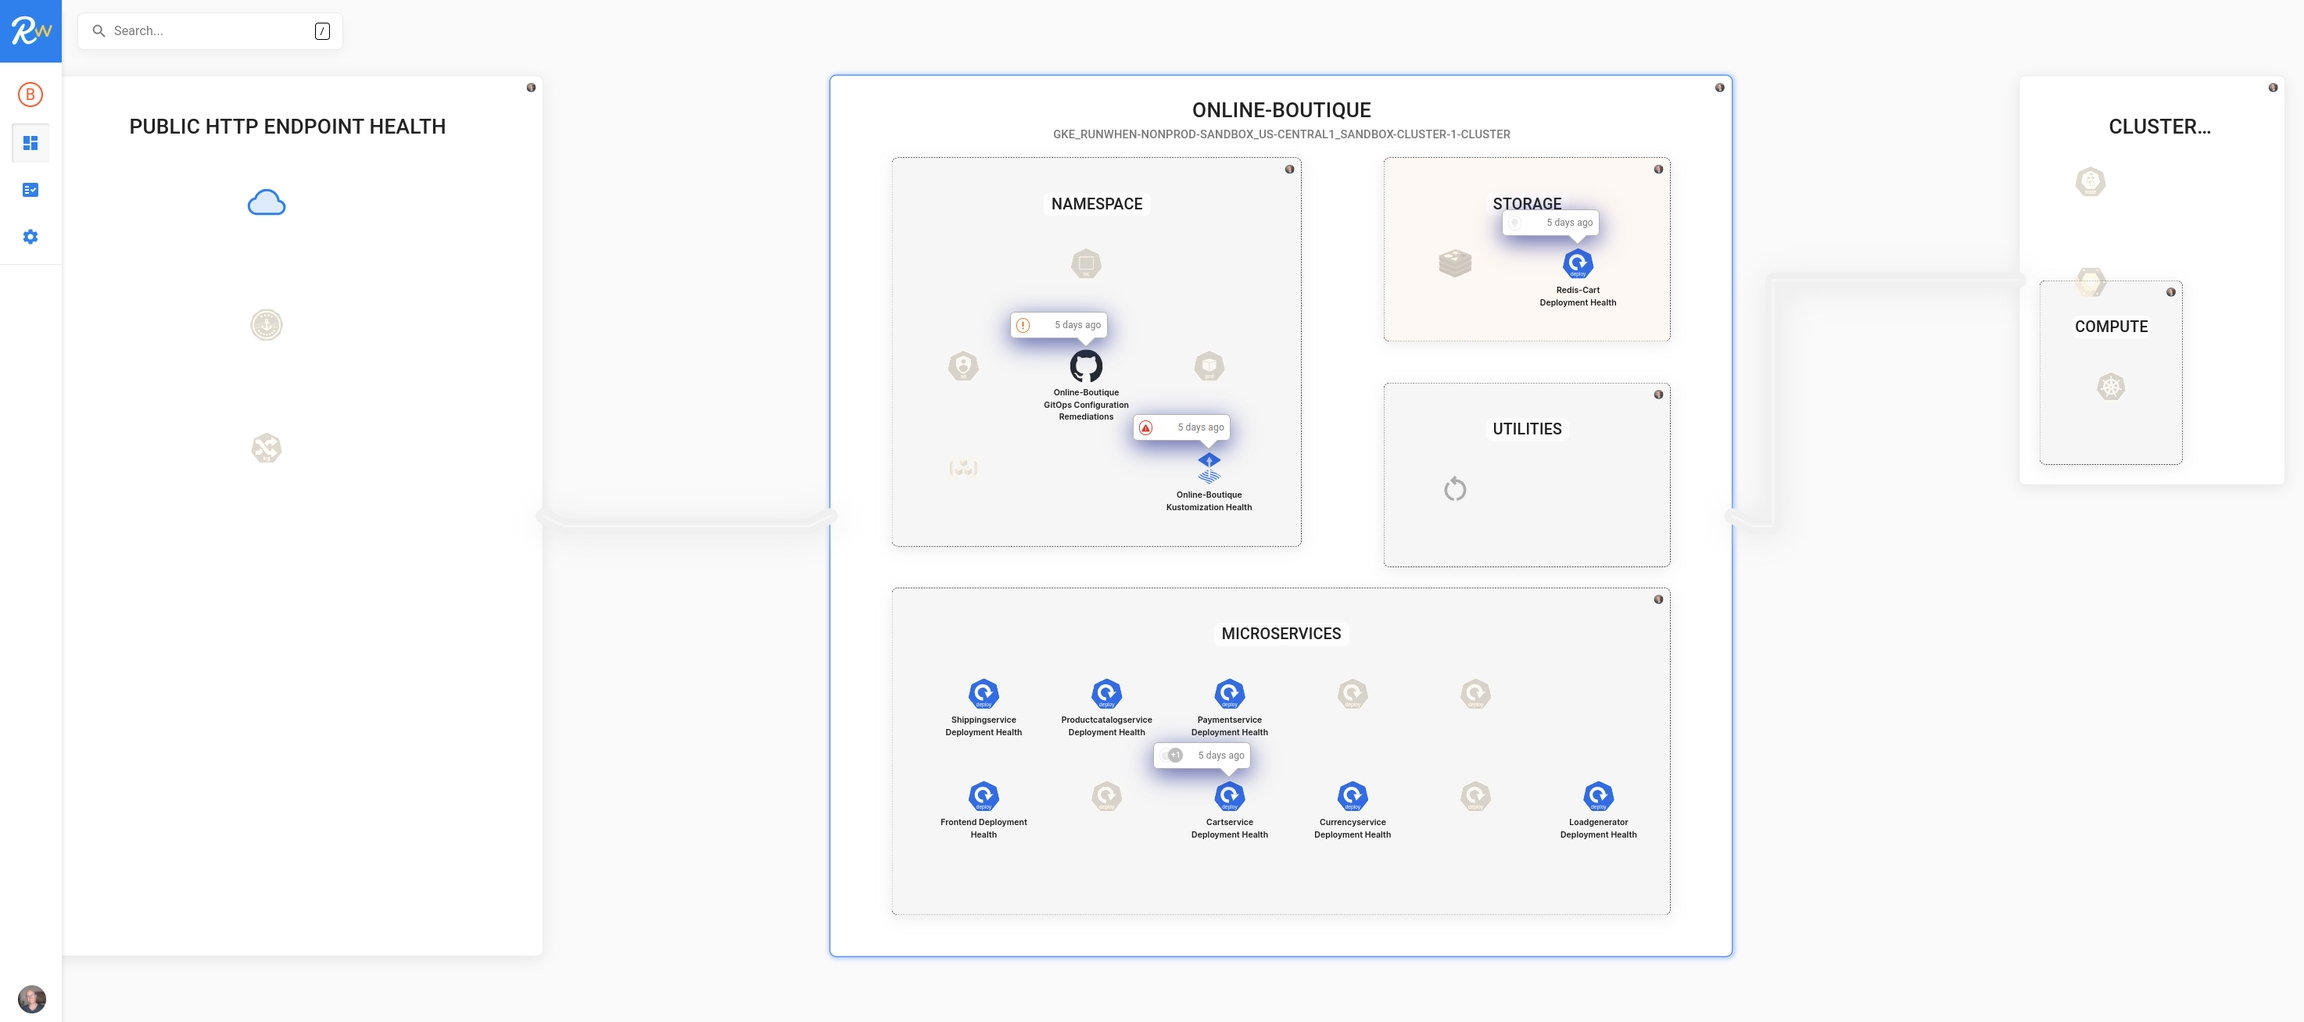
Visit the Workspace Map in the RunWhen Platform
Once the content has uploaded, the Workspace Map will begin to render
All self-hosted runner pods should be functioning, and new pods should start up - each of these pods running automatically configured Tasks from the auto-generated map
What Happens Next?
It may take a little time for the new workspace to index all of the tasks and objects that were created:
While this is taking place, we suggest:
Add team members to your workspace
Check out the interactive tutorials to learn more about interacting with the Map, Digital Assistants, and RunSessions